
| Lesson | Principle | Level | Theme | Reading Time |
|---|---|---|---|---|
| #001 | Basic | Beginner | Clearance | 4 min |
Lesson Objective :
Freeing a square is the act of actively moving or sacrificing a piece occupying a crucial square to make room for another piece with better attacking potential at that position (usually a Queen, Rook, or Bishop) with the aim of executing a decisive attack or checkmate.
Key Takeaways
- A clearance tactic removes one of your own pieces from a critical square.
- The goal is to improve the activity of another piece.
- Clearance can lead to checkmate, material gain, or a stronger position.
- Always ask whether one of your own pieces is blocking your best idea.
Example 1 – Vacating the Square
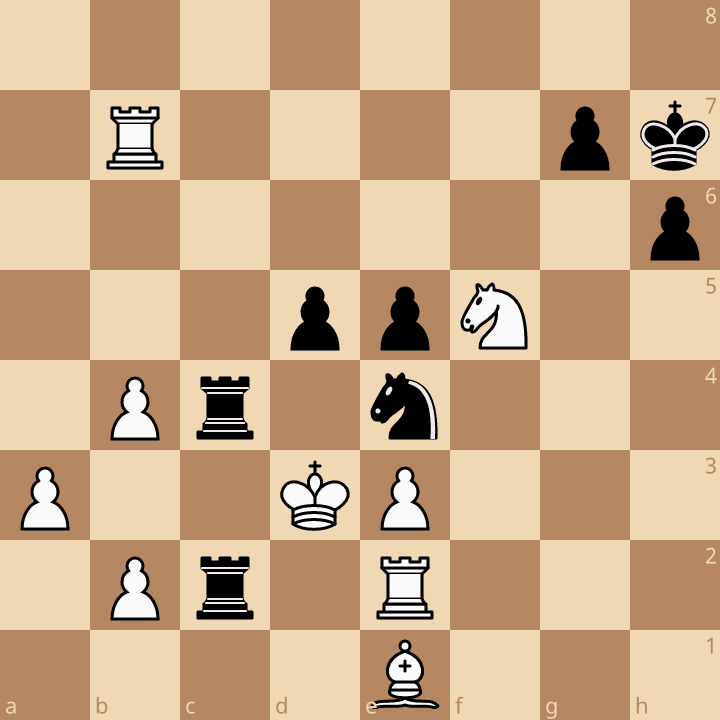
At first glance, White appears to have the advantage, enjoying an extra minor piece and a well-supported king. However, Black identifies a tactical opportunity based on the concept of clearance, where a piece is moved or sacrificed to free a critical square for another attacking piece.
The key move is the brilliant 1…Nf2+!!. By sacrificing the knight, Black not only forces White to respond to the check but also vacates the f4 square for the pawn. White’s best response is 2.Rxf2, accepting the sacrifice and seemingly winning more material.
Only then does Black reveal the true idea with 2…f4#. The pawn delivers a stunning checkmate, while White’s own pieces restrict the king’s escape squares. What initially looked like a strong defensive position becomes a perfectly executed mating net.
This example highlights an important tactical lesson: the strongest move is not always a direct attack. Sometimes, sacrificing one of your own pieces to clear a vital square allows another piece to deliver the decisive blow. When analyzing a position, always ask whether one of your own pieces is blocking a stronger attacking idea. Recognizing such opportunities can transform an ordinary position into a brilliant tactical finish.
Solution: 1…Nf2+!! 2.Rxf2 f4#
Example 2 – Sacrificial Clearance
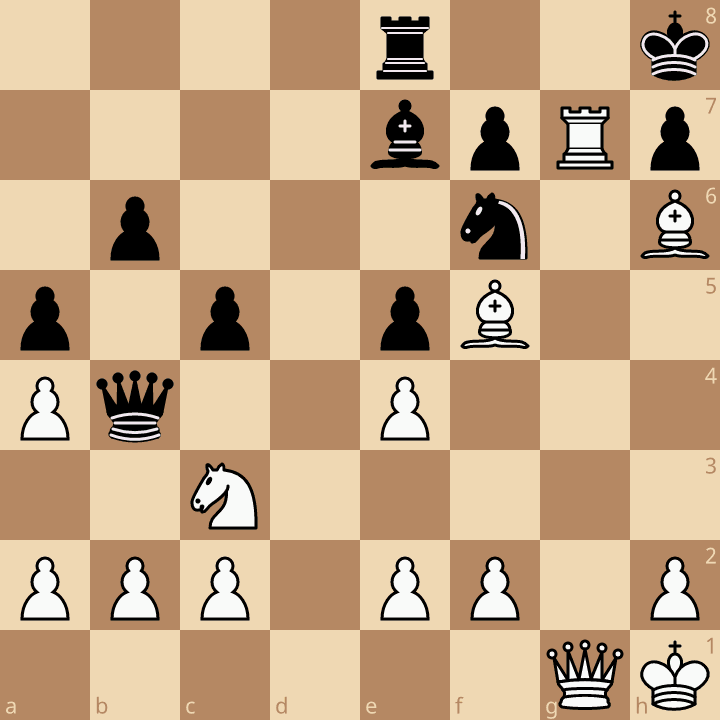
This position demonstrates one of the most elegant applications of the clearance tactical motif. White has developed a powerful attack against the Black king, with the rook, bishop, and queen working together to create multiple threats. However, the rook on g7 occupies a crucial square that would be even more effective if controlled by the queen. To unlock the full potential of the attack, White first needs to remove the rook from the board.
The brilliant move 1.Rxh7+!! achieves exactly that. White willingly sacrifices the rook, forcing 1…Nxh7, as declining the sacrifice would leave Black in an even worse position. Although White gives up material, the sacrifice clears the g7 square and opens the diagonal for the queen to join the attack.
With the rook gone, White delivers the decisive move 2.Qg7#. The queen now occupies the square previously blocked by the rook and delivers a beautiful checkmate. Black’s king has no escape squares, and the surrounding pieces are unable to intervene.
This example illustrates that clearance is not always about creating space for a pawn or another minor piece. Sometimes, sacrificing a major piece allows a stronger attacking piece to occupy a critical square and finish the game. Before launching an attack, always consider whether one of your own pieces is blocking your best tactical idea.
Solution: 1.Rxh7+!! Nxh7 2.Qg7#
Practice Exercises
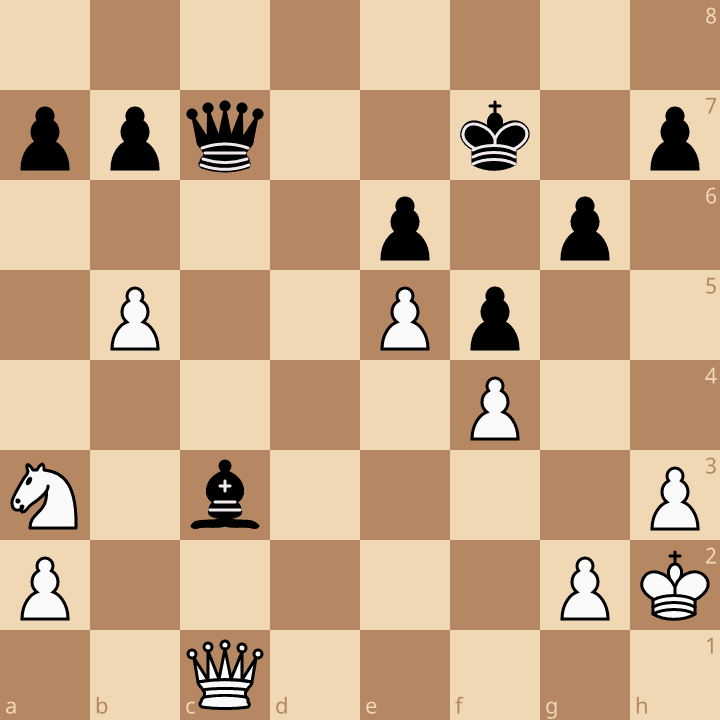
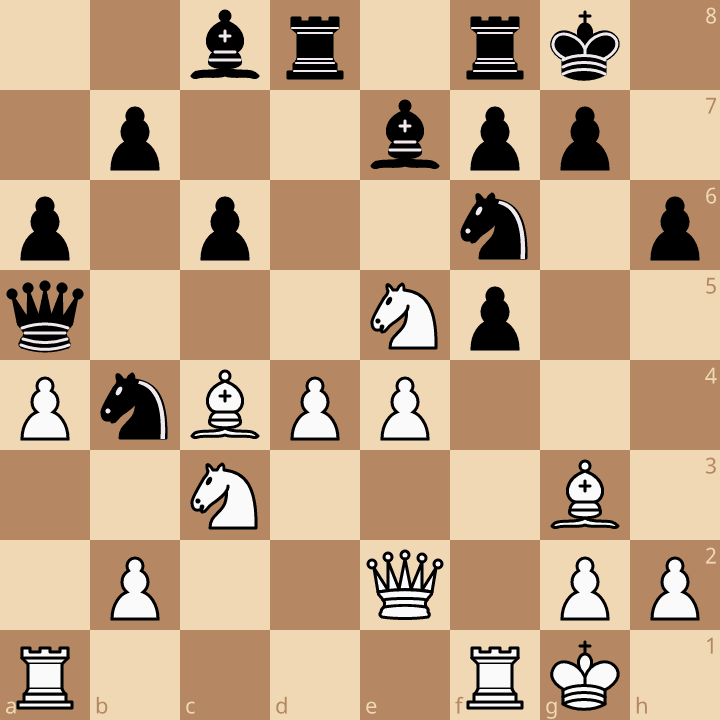
Note: Click on the Lichess Study to explore the complete solution move by move.
From the Editor
Can you find a clearance opportunity in one of your own recent games? Review your last five games and identify whether moving or sacrificing one of your own pieces could have created a stronger attack.